How to Plan Your First Overlanding Route — Research, Permits, and Knowing Your Limits
Overlanding has gotten complicated with all the glamorized content flying around. Everyone’s posting these sweeping drone shots of lifted rigs crossing alpine meadows, and meanwhile actual beginners are out there — I was out there — trying to reverse-engineer a week-long wilderness traverse from a YouTube thumbnail. I spent six months deep in overlanding content before my first real trip. Bookmarked routes, watched build videos until 2 a.m., mentally sketched out a Cascades crossing I had absolutely no business attempting. The vehicle doing all this dreaming? A stock 2019 Honda CR-V. 7.9 inches of ground clearance. Zero recovery gear. Not a single traction board in the back.
Nobody flagged it. Nobody in any comment section said hey, maybe check your specs before planning a Rubicon-rated route. I high-centered on a rocky two-track four miles from the trailhead — alone, Friday afternoon, September — and that was my real orientation into overlanding. Don’t make my mistake.
The most important lesson I took from that afternoon isn’t about maps or permits or packing. It’s about vehicle capability — specifically, understanding yours before you ever open a route planner.
Start With Your Vehicle — Not the Route
Probably should have opened with this section, honestly.
The standard beginner move is finding a gorgeous route — something from an Expedition Overland episode or a photo that got 40,000 likes on Instagram — and then trying to figure out how to make your vehicle handle it. That’s backwards. You need to know exactly what your rig can do first, then find routes that fit inside those parameters. It sounds obvious. It isn’t, apparently, because I didn’t do it, and neither does a significant portion of the beginner overlanding community.
Three numbers matter most when you’re sizing up a vehicle for off-road use.
- Ground clearance — the distance between the lowest solid point of your vehicle and the ground. This is what determines whether you clear rocks, ruts, and embedded roots without dragging metal across them.
- Approach and departure angles — approach angle is how steep an obstacle your front bumper can climb without making contact; departure angle is the same measurement for your rear end. A long front overhang — even on an otherwise capable vehicle — absolutely kills your approach angle.
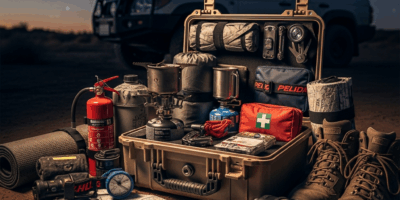
- Recovery capability — hi-lift jack, traction boards, tow strap, a shovel with a decent handle. Are you running with a second vehicle? Solo recovery capability is a hard ceiling on what routes make sense.
Here’s how some common vehicles actually land. A stock Toyota Tacoma TRD Off-Road has roughly 9.4 inches of ground clearance with reasonable approach and departure angles — it accesses most USFS roads rated for full-size vehicles without touching the suspension. A stock Jeep Wrangler Rubicon sits around 10.8 inches with factory skid plates and solid axles, genuinely capable on stock tires in terrain that would end other vehicles’ afternoons. The Honda CR-V — my CR-V — sits at 7.9 inches. Great vehicle. Legitimately beautiful places it can reach. Graded gravel roads, forest access routes that haven’t washed out. That’s the lane.
None of that is a judgment. The mistake isn’t owning a CR-V. The mistake is planning a Wrangler route in a CR-V because the photos looked manageable.
Look up your specific vehicle’s ground clearance on the manufacturer’s spec sheet — not a forum post, not a Reddit thread. The actual spec sheet. Write the numbers down — ground clearance, approach angle, departure angle — before you open a single map.
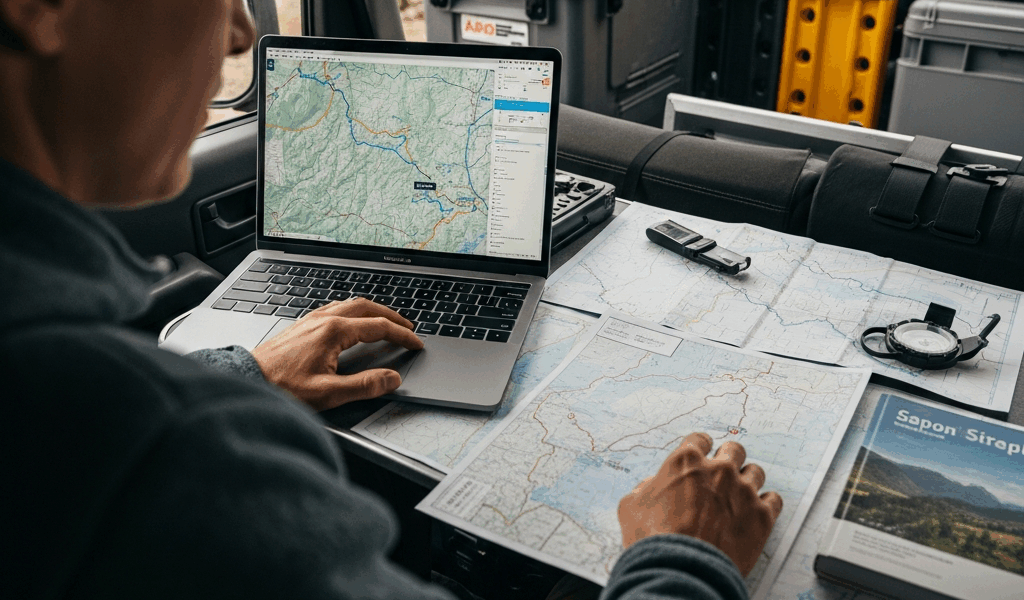
Where to Find Routes — Official and Community Sources
Once you have your vehicle’s numbers, you’re ready to actually research routes. Two categories of sources are worth your time: official government sources for legal classification data, and community sources for current real-world conditions. You need both. They answer different questions.
Official Sources
But what is an MVUM? In essence, it’s the Motor Vehicle Use Map published by the USFS for every ranger district — a free download showing every legally motorized route on National Forest land, classified by vehicle type. But it’s much more than that. The MVUM tells you immediately whether your vehicle is even legally permitted to be on a given road. Routes designated for full-size highway-legal vehicles, routes for OHVs only, seasonal closures — it’s all there. You can download these from any ranger district website or pick up a paper copy at the district office for nothing. Literally free.
For desert and Great Basin travel, BLM recreation maps cover the equivalent information on Bureau of Land Management land — also free, available through BLM state office websites. These are the starting point before anything else.
Community Sources
Official maps tell you what roads exist and what’s legal. Community sources tell you what those roads actually look like right now — which is a completely different question.
iOverlander is a GPS-based platform where overlanders post camp reviews and road conditions with dates attached. OnX Offroad layers road classification data on satellite imagery and lets you download offline maps — the annual subscription runs around $29.99 and pays for itself fast. The Overland Bound forum has a trip reports section organized by region, and that’s where you find the most granular recent information available anywhere.
A trip report posted three weeks ago by someone driving your specific vehicle on your specific route is worth more than any official map for understanding current conditions. “FR-2612 crossing was about 18 inches deep, rocky bottom, take it slow” — that’s something a paper map can never give you. Seek those reports out aggressively. Post in the forum and ask directly if you can’t find a recent one. The overlanding community is genuinely helpful to people who ask specific questions rather than vague ones.
Researching Conditions Before You Go
Route research and conditions research are not the same thing — conflating them catches a lot of beginners off guard. You might research a route thoroughly in January for a June trip. That research tells you the road exists, who manages it, what it looked like in the most recent trip reports. It tells you nothing about what happened to that road between January and June.
Seasonal Access Windows
Many forest roads in the western United States close between November and May — sometimes later depending on elevation and snowpack. Specific closure dates vary by forest, by ranger district, and by individual road. Don’t rely on a general National Forest website for this. Go to the specific ranger district page managing your roads, find their road conditions or closure page, and check it close to your departure — not two weeks out.
Spring mud deserves its own mention. Roads that are technically open in April can be genuinely impassable and destructive to the surface when driven wet. The USFS sometimes posts voluntary closure requests even when roads aren’t under formal closure. Respect those. The roads that exist for future overlanders depend on people not rutting them out when they’re soft.
Fire Activity and Water Crossings
Recent fire activity can close road corridors entirely — sometimes for years during recovery. Check CalFire for California, InciWeb for nationwide fire information, or your state’s equivalent. A route that was open last August may be sitting inside a closure area that nobody updated on any forum anywhere.
Water crossings are probably the most underestimated hazard in beginner planning. That’s what makes crossings so endearing to us as a learning experience — they look manageable right up until they aren’t. A crossing that showed up in a July trip report as knee-deep and sandy might be running chest-height and full of debris in May after a wet winter. Specific numbers matter here. “The creek at mile 14 on FR-2230 was about 24 inches deep with a rocky bottom running fast” is useful information. “The crossing was fine” is not. Ask on Overland Bound or check the ranger district’s social media after any significant rain event in the area.
Permits, Fees, and Legal Considerations
The permitting landscape for overlanding on public land is simpler than most beginners expect — with a few specific situations where it gets more complicated.
National Forest roads are generally accessible without any permit for day-use travel. Some popular trailhead areas charge a Recreation Fee — usually $5 to $10 per day under the America the Beautiful program — and the $80 annual pass covers most of those. If you’re hitting multiple forests in a season, it pays for itself by the third trip, probably sooner.
Dispersed camping on National Forest and BLM land is free in most areas and requires no reservation. You can camp off-road within a certain distance of an existing two-track — typically 150 feet in most forests, though the specific forest plan governs — stay up to 14 days, and then you need to move. That 14-day rule gets enforced more actively in popular areas near urban centers. Worth knowing going in.
Wilderness areas are a separate situation entirely. They often border or adjoin national forest roads — day hiking into them is completely fine. Motorized vehicles are prohibited in all designated wilderness areas, full stop. Know where the wilderness boundary is before you start following spur tracks off the main road.
Campfire rules change fast during fire season. A restriction in effect when you’re packing might be lifted or upgraded by the time you arrive — or vice versa. Check the specific ranger district page in the 48 hours before departure. Not a week out. Violating active fire restrictions carries real fines and, honestly, real consequences that go beyond the fine.
The Go/No-Go Decision — Reading Conditions on the Day
Everything above is pre-trip research. It tells you what conditions were at some point in the past. The morning of your trip, the job is reading what conditions actually are right now — and that’s a different skill.
Frustrated by how often this step gets skipped entirely, experienced overlanders I’ve talked to treat the go/no-go decision as a formal checkpoint built into the trip structure — not an afterthought. Set a specific waypoint before you leave. A road junction, a creek crossing, a particular mile marker. Commit to a genuine reassessment there. Before you leave pavement, the route might look manageable. Three miles in, with mud deeper than anticipated and a cloud line dropping fast, the honest answer might be different.
Mud that looked passable in forum photos can be axle-deep after a rain event you didn’t fully account for. A water crossing that was 18 inches in a July report can be running 36 inches in spring and moving fast. Those aren’t edge cases — that’s normal variation in mountain and desert environments. Plan for it anyway.
This new idea — building a formal turn-around commitment into the trip rather than deciding on the fly — took off several years later among beginner overlanding communities and eventually evolved into the pre-trip checklist approach enthusiasts know and swear by today. Write your turn-around criteria down before you leave. In your notes app, on a sticky note in the center console, wherever. Then actually use them when you hit the waypoint. The emotional cost of turning around is measurably lower than the cost of a recovery — or a suspension repair.
Planning your first overlanding route well comes down to honest assessment in the right order: vehicle capability first, route selection second, conditions research third, permits and legal considerations fourth, real go/no-go decision on the day. That sequence won’t make every trip perfect. It will make the trips that don’t go perfectly survivable — and that’s the whole point.


Stay in the loop
Get the latest trail owl updates delivered to your inbox.