Why One Gear Setup Doesn’t Work Year-Round
As someone who’s hiked through every month of the year for over a decade, I can tell you that the gear system I dialed in for July absolutely fails me in January. I learned everything about seasonal adaptation through uncomfortable experiences – finishing hikes by headlamp when I didn’t plan to, getting caught in spring mud with summer shoes, shivering at a summit in “extra layers” that weren’t nearly enough.
Probably should have led with this, but hiking through all four seasons requires fundamentally different equipment, not just adding more stuff to your pack. Temperature extremes, precipitation patterns, daylight hours, and trail conditions change so dramatically that each season demands specific gear choices.
Here’s what I’ve figured out about modifying your hiking setup for spring, summer, fall, and winter – so you can hike safely and comfortably every month.
Spring Hiking: Mud, Rain, and Wild Temperature Swings
What Makes Spring Difficult
Spring hiking offers wildflowers and fewer crowds, but brings its own headaches:
– Muddy trails from snowmelt and spring storms
– Lingering snow at elevation
– Morning temps in the 30s, afternoon temps in the 60s
– Frequent rain that appears from nowhere
– Stream crossings running high and fast
– Weather systems that change your plans mid-hike
Spring Footwear Reality
My standard trail runners become useless sponges in spring conditions. Here’s what actually works:
**Waterproof hiking boots:** Mid-height with a waterproof membrane keeps feet dry through mud and shallow crossings. The ankle support helps on slick, unstable trails.
**Gaiters:** Low gaiters stop mud and debris from getting into your boots at the collar. Water-resistant versions are worth the small weight penalty.
**Microspikes:** If you’re heading to any elevation where snow lingers, carry them even if the trailhead looks clear. Morning ice catches people off guard constantly.
Spring Layering That Actually Works
Spring’s temperature swings demand versatility:
**Base layer:** Lightweight merino or synthetic for temperature regulation. Cotton is still a disaster – it stays wet from rain or sweat.
**Mid-layer:** Fleece or lightweight insulation for cold starts. Has to pack down small because you’ll pull it off by midday.
**Shell layer:** A waterproof rain jacket isn’t optional in spring. Rain materializes suddenly. Pair with rain pants if you’re expecting sustained wet conditions.
**Gloves and hat:** Lightweight fleece for cold morning starts. They pack tiny and you’ll be glad you have them.
What I Add to My Pack in Spring
– Extra socks (stream crossings or just mud saturation)
– Trekking poles (stability on muddy trails and water crossings)
– Water treatment (spring runoff contaminates sources)
– Bug spray (mosquitoes wake up in late spring)
– Sunscreen (spring sun is deceptively strong)
Summer Hiking: Heat, Sun, and Afternoon Thunderstorms
What Makes Summer Challenging
Summer looks easy until you’re dealing with:
– Temperatures that exceed 90-100F depending on location
– Sun exposure that’s relentless
– Afternoon thunderstorms (especially in mountain regions)
– Real dehydration risk
– Crowded trailheads and popular destinations
– Insects everywhere (mosquitoes, ticks, flies)
Summer Footwear
**Trail runners:** Most experienced summer hikers ditch boots entirely. Benefits I’ve noticed:
– Feet actually breathe (huge comfort difference)
– Lighter weight (less fatigue over long miles)
– Dry faster after water crossings
– Generally more pleasant in heat
Pair with lightweight hiking socks – thin merino or synthetic. Some people use liner socks under these to reduce friction in hot, sweaty conditions.
**Camp sandals:** For around camp or easy water crossings, lightweight hiking sandals give your feet a break and handle streams without soaking your hiking shoes.
Summer Clothing Strategy
Minimal layers, maximum sun protection:
**Sun shirt:** Lightweight, moisture-wicking, with UPF protection. Long sleeves actually keep you cooler than short sleeves plus sunscreen because they prevent the sun from heating your skin directly. Light colors reflect heat.
**Bottoms:** Lightweight hiking pants or zip-off convertibles. Cotton shorts chafe when you’re sweating and don’t protect from sun.
**Sun hat:** Wide-brimmed for face and neck. Ventilation features prevent your head from overheating. Chin strap keeps it attached in wind.
**Sun protection:** SPF 30+ sunscreen, lip balm with SPF, quality sunglasses.
Summer Hydration Reality
Summer demands significantly more water than other seasons:
– 1-2 liters minimum for moderate hikes (more for anything strenuous)
– Hydration bladder encourages steady drinking
– Water filter for refilling from streams
– Electrolyte tablets to replace what you’re sweating out
Summer Weather Gear
Despite the heat, afternoon storms require rain gear:
– Ultralight packable rain jacket (for sudden storms)
– Optional rain pants (or accept wet legs if temps are warm enough)
– Dry bag for electronics and anything that can’t get wet
Plan your routes to be off exposed ridges and summits before early afternoon when storms typically develop.
Fall Hiking: Shorter Days and Temperature Roulette
What Makes Fall Tricky
Fall gives you spectacular foliage and pleasant temperatures, but introduces:
– Rapidly shortening daylight (sunset by 6-7 PM, then earlier)
– Mornings in the 40s, afternoons in the 60s
– First snow at elevation
– Wet leaves creating surprisingly slippery conditions
– Cold fronts that arrive with little warning
Fall Footwear
Time to return to more substantial shoes:
**Hiking boots:** Mid-height provides ankle support on leaf-covered trails where roots and rocks hide. Waterproof versions handle frost and wet leaves.
**Warmer socks:** Move from lightweight to midweight merino as temperatures drop.
Fall Layering
Fall requires the most versatile system:
**Base layer:** Midweight merino or synthetic. Start wearing it, often remove by midday.
**Mid-layer:** Fleece or synthetic insulated jacket. Essential for breaks, summits, and morning starts.
**Shell layer:** Your waterproof jacket does double duty as rain protection and wind protection. Fall wind chill is significant.
**Puffy jacket:** Lightweight down or synthetic insulation for breaks and summits. Temperatures at elevation can be 20-30F colder than the trailhead.
**Accessories:** Warm hat, gloves, neck gaiter for those cold morning starts and windy summits.
Fall Lighting – This Is Critical
Shorter days catch people constantly:
– Headlamp with fresh batteries (not optional – mandatory)
– Start hikes earlier to account for earlier sunset
– Build in conservative turnaround times
– Carry backup light source
More hikers get caught by darkness in fall than any other season because they underestimate how quickly the sun disappears compared to summer.
Winter Hiking: Cold, Snow, Ice, and Very Short Days
What Makes Winter Demanding
Winter hiking is the most gear-intensive:
– Sustained cold (often below freezing all day)
– Snow-covered trails requiring navigation skills
– Ice on trails, crossings, exposed rock
– Very short daylight (sunset by 4:30-5:30 PM)
– Real frostbite and hypothermia risk
– Heavier pack because of extra gear and layers
Winter Footwear System
This is where gear choice matters most:
**Insulated winter boots:** Standard hiking boots aren’t warm enough. Winter-specific boots with 200-400g insulation keep your feet functional in sub-freezing conditions.
**Traction devices:** Non-negotiable for winter hiking:
– Microspikes: For packed snow and ice (most winter hiking)
– Crampons: For steeper terrain and serious ice
– Snowshoes: For deep, unpacked snow (6+ inches)
**Gaiters:** Full-height waterproof gaiters stop snow from getting into boots and keep lower legs dry.
**Socks:** Heavyweight merino, possibly with liner socks. Some people use vapor barrier liners in extreme cold to keep insulation dry.
Winter Layering System
Winter requires the full treatment:
**Base layer:** Heavyweight merino or synthetic, top and bottom. This stays on the entire hike.
**Mid-layer bottoms:** Softshell or insulated pants over your base. Has to allow movement while blocking wind.
**Mid-layer top:** Fleece or lightweight insulation. You’ll hike in this on cold days, remove it on warmer ones or during hard climbs.
**Insulation layer:** Medium to heavy puffy jacket (down or synthetic). Essential for any stop longer than a few minutes.
**Shell layer:** Waterproof, windproof jacket and pants. Winter windchill is dangerous – shells are mandatory, not optional.
**Accessories:**
– Warm winter hat (fleece or wool)
– Insulated gloves or mittens (mittens are warmer)
– Liner gloves for moderate cold or under main gloves
– Neck gaiter or balaclava for face protection
– Goggles or glacier glasses for snow glare and wind
Winter Safety Equipment
Winter hiking requires additional safety gear:
– Emergency bivy or space blanket
– Fire-starting kit (waterproof matches, lighter, tinder)
– Extra food (cold burns more calories)
– Insulated water bottle or hydration insulator (prevents freezing)
– Avalanche gear if in avalanche terrain (beacon, probe, shovel – plus the training to use them)
– Navigation tools (GPS, map, compass – snow covers trail markers)
Managing Gear Across Season Transitions
The In-Between Months
Some months don’t fit neatly into seasons:
**March/April:** Snow persists at elevation while valleys warm up. Carry microspikes even if the trail starts bare. Bring both lightweight and warm layers.
**October/November:** Cold mornings, warm afternoons. Multiple mid-layer options let you dial in temperature regulation.
Regional Differences
These guidelines assume temperate climates with four distinct seasons. Adjust for where you actually hike:
**Desert:** Summer requires pre-dawn starts, massive water capacity, obsessive sun protection. Winter is actually prime season.
**Tropics:** Limited seasonal variation. Focus on rain gear during wet season, sun and hydration during dry season.
**Alpine:** Extended winter conditions. Summer still requires cold-weather gear for elevation and weather changes.
The Ten Essentials by Season
The classic list adapts seasonally:
**Navigation:** Always required. Winter demands better skills because snow covers trails.
**Sun protection:** Most critical in summer and winter (snow reflection). Moderate in shoulder seasons.
**Insulation:** Minimal summer, maximum winter.
**Illumination:** Critical fall/winter (early darkness), less important summer (extended daylight).
**First-aid:** Always required. Add blister treatment summer, hand warmers winter.
**Fire:** More important winter (emergency warmth), less critical summer (fire restrictions common).
**Repair kit:** Always needed. Add duct tape for gear repairs, especially winter gear failures.
**Nutrition:** Higher calorie needs winter (cold burns energy), electrolyte needs summer (sweating).
**Hydration:** Maximum capacity summer, insulated systems winter (prevent freezing).
**Emergency shelter:** Always required. Winter demands more robust options (space blankets don’t cut it in extreme cold).
Building a Year-Round Hiking Wardrobe
Cost-Effective Approach
You don’t need separate gear for each season. Build a versatile foundation:
**Core pieces (three-season use):**
– Quality waterproof shell jacket
– Mid-height waterproof hiking boots
– Fleece mid-layer
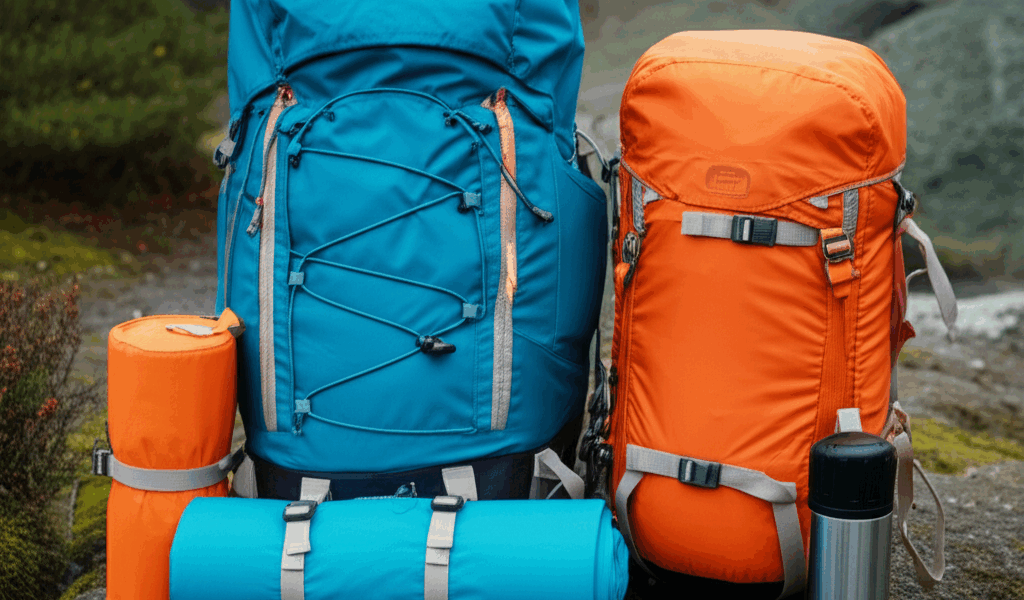
– Hiking backpack (30-40L)
– Trekking poles
– Base layers (various weights)
**Summer additions:**
– Trail runners
– Lightweight sun shirt
– Sun hat
– Extra hydration capacity
**Winter additions:**
– Insulated winter boots
– Microspikes/crampons
– Insulated jacket
– Winter accessories (warm hat, gloves, gaiter)
– Shell pants
This approach minimizes investment while ensuring appropriate equipment for all conditions.
Seasonal Gear Storage and Maintenance
Taking Care of Off-Season Gear
Proper storage extends gear life significantly:
**End of season:**
– Clean everything thoroughly (dirt degrades fabrics)
– Reproof waterproof items (DWR treatment)
– Repair damage before storage
– Store in dry, moderate temperature location
**Before next season:**
– Inspect all gear for damage
– Replace worn components (laces, insoles, straps)
– Test waterproofing (re-treat if water doesn’t bead)
– Replace batteries in everything
Starting Your Four-Season Hiking Journey
If you’ve only hiked summer months, transitioning to year-round requires planning:
**Start with shoulder seasons:** Spring and fall introduce challenging conditions without the extreme consequences of winter. Learn to manage temperature swings and variable weather before tackling snow and ice.
**Build skills progressively:** Each season requires different abilities. Navigation, layering management, winter camping, avalanche awareness – add these incrementally.
**Take courses:** Winter hiking skills, avalanche safety (if you’ll be in that terrain), wilderness first aid, navigation – formal training beats learning through painful experience.
**Find experienced partners:** Learning from people who already hike year-round accelerates your education dramatically. Their gear choices and techniques provide practical lessons.
**Know when to bail:** Sometimes conditions exceed your gear or skills. Retreating isn’t failure – it’s judgment that keeps you alive.
What You Get from Year-Round Hiking
That’s what makes adapting your gear worthwhile – 12 months of hiking instead of 4-6. Winter landscapes offer solitude and beauty that summer trails can’t match. Spring wildflowers and fall colors create experiences impossible in peak season.
Yes, it requires more gear and more preparation. Winter hiking especially demands respect. But the reward is access to trails every month, experiences in every season, and a connection to the outdoors that fair-weather hiking never provides.


Stay in the loop
Get the latest wildlife research and conservation news delivered to your inbox.