Why Roof Rack Rattle Is So Hard to Pin Down
Roof rack rattling has gotten complicated with all the bad diagnostic advice flying around. You’re cruising at 60 mph on a gravel highway and suddenly this metallic chattering fills the cab. Sounds like the driver’s side. Then you shift lanes and swear it’s the passenger rail. By the time you pull over, you’ve mentally rebuilt the entire rack and blamed every bolt in sight — none of which was actually the problem.
Here’s the thing: the rattle originates in exactly one spot. Wind noise, road texture, and cabin acoustics bounce it around your ears until the source feels completely unknowable.
As someone who spent two full hours tightening every visible fastener on my Prinsu rack, I learned everything there is to know about chasing phantom rattles. The noise turned out to be a single loose T-slot nut I’d walked past three times. Don’t make my mistake.
Today, I will share it all with you. The diagnostic mindset matters more than the wrench. Three main culprits hide in roof racks: mounting feet, crossbar-to-side-rail connections, and loose accessories or tie-down hardware. Address them in that order — at least if you want to actually solve this before your next trip.
Start Here — Check the Mounting Feet First
The feet are where your rack contacts the vehicle roof or rain gutters. Load-bearing, constantly flexing, and responsible for the majority of rack rattles by a wide margin. Start there.
Inspect every mounting foot by hand. Look for:
- Loose T-slot bolts that have vibrated free. Cheap to fix and incredibly easy to miss.
- Worn or compressed rubber isolators — they should feel firm, not spongy or cracked.
- Feet that have shifted sideways on the rain gutter or roof surface.
- Missing or loose washers under bolt heads.
Get a helper for the next part. Have them drive slowly — 5 mph is plenty — over a speed bump while you press down firmly on each foot mounting point. Feel for movement. Does the foot pivot? Slide side-to-side? Does the bolt spin freely under pressure? Any of those answers is your culprit.
Once you’ve identified the bad foot, pull the bolt completely. Check the threads. Gummed with dirt, corrosion, or old Loctite? Clean with a wire brush. Replace the rubber isolator if it’s visibly damaged — these run $8–15 direct from most manufacturers. Totally worth it.
Reinstall with a washer under the bolt head. Torque it properly. Most rack manufacturers spec 15–20 ft-lbs for foot bolts, though your manual has the final word. Hand-tight plus a quarter turn is not torque. Over-tighten and you crush the isolator. Under-tighten and you’re back to square one. A basic torque wrench costs around $25 and removes all the guessing.
Check all four feet this way. I’m apparently the kind of person who ignores the ones that seem fine — and Snap-on works for me while the $12 harbor freight version never quite clicked right. Check them all anyway. If one foot rattled loose, others probably did too.
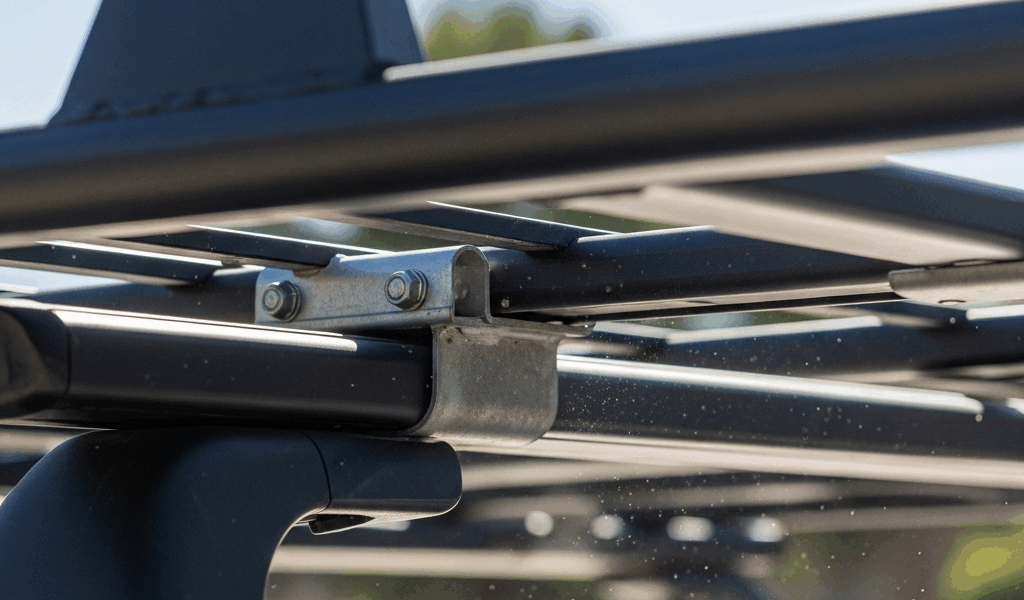
Crossbar Slop and Side Rail Movement
Probably should have opened with this section, honestly. Crossbar slop is sneaky in a way mounting feet aren’t.
Most racks use channeled side rails. Crossbars slide in and lock via bolts or end caps. Over time that connection develops play — not enough to feel while standing still, but at highway speed, every bump lets the crossbar shift microscopically inside the channel. The result is a rhythmic clunk, not a constant buzz. That distinction matters for diagnosis.
Remove any accessories on the crossbars first. Push and pull each crossbar at multiple points along its length, checking for vertical and lateral movement. Movement means the end caps are worn or the bolts need resetting.
Loosen the bolts securing each crossbar end cap — usually two per side. Slide the crossbar fully into the channel until it stops hard. Then tighten. Proper torque here runs 10–15 ft-lbs for most systems. Apply anti-seize compound to the threads before reassembly. It costs about $8 a tube, prevents corrosion, and makes future disassembly something other than a nightmare.
But what is an end cap, really? In essence, it’s just a plastic compression fitting. But it’s much more than that — it’s the only thing maintaining consistent pressure between the crossbar and the channel wall. If a cap is cracked, flattened, or discolored from UV exposure, no amount of bolt torque fixes the underlying problem. A single replacement cap runs $12–30 depending on brand. Order two while you’re at it.
If the rattle persists after re-torquing and the caps look fine, run your finger inside the channel at the problem spot. Dents or dings let the cap sit unevenly. Small ones can sometimes be tapped out carefully with a rubber mallet. Deep damage means the rail itself is compromised — that’s a replacement conversation.
Accessories and Tie-Down Points Are Usually the Hidden Culprit
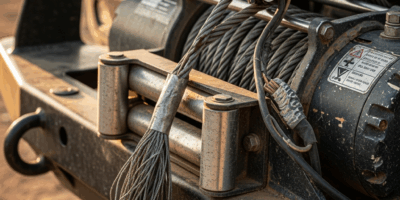
Everything bolted or strapped to your rack becomes a noise-maker at speed. Hi-Lift jack mounts, Rotopax 2-gallon fuel containers, empty D-rings, webbing straps flapping in the breeze — each one rattles independently of the rack itself. And because they’re mounted high, that noise travels straight into the cab like it’s coming through a speaker.
That’s what makes this section endearing to us overlanders. We spend $800 on a rack and $400 on accessories and then spend two weekends blaming the rack for what the accessories are doing.
Do a shake test first. With the vehicle parked, grab each accessory and shake it hard. Any movement at all is a rattle waiting to happen at 65 mph. Tighten the mounting bolts. Check for lost fasteners. Look for straps that are wrapped but not actually cinched.
Then remove everything. Every accessory off the rack — cargo basket, light bars, antenna mounts, all of it. Drive at the speed where the rattle usually lives. Quiet? The rack is innocent. Go back and tighten or replace whatever moved during the shake test.
Pay attention to webbing especially. A loose strap slapping the rack at highway speed creates a sound nearly identical to structural rattle. Secure every loose end with a carabiner, velcro wrap, or a proper tie-down loop. No loose tails, no exceptions.
If the rack still rattles after everything is off, return to the feet and crossbars. The problem is structural and you haven’t found it yet. So, without further ado, go back to step one.
Once It’s Fixed, Keep It Quiet Long Term
A properly dialed rack should be nearly silent at highway speed. If rattle returns within a month, the fit between the feet and your specific rain gutter geometry might be the issue — shallow gutters on certain platforms don’t grip mounting feet the way deeper ones do. Worth a call to the manufacturer before you start modifying anything.
Establish a maintenance schedule. Every 3–4 overlanding trips — or after any significant washboard section — spend 20 minutes re-torquing every foot and crossbar bolt. Not glamorous. Completely essential.
While you won’t need a full shop setup, you will need a handful of things: a quality torque wrench, anti-seize compound, a wire brush, and replacement isolators for your specific rack model on standby. Keep them in the rig. Frustrated by a rattle developing mid-trip on a remote stretch of the Mojave Road, I learned to carry a small zip-lock bag of spare T-slot nuts and M6 bolts using a $3 organizer from Harbor Freight. That was 2021. Haven’t been caught without the right hardware since.
Replace rubber isolators before they fail completely. At the first sign of compression or hardening — not when they’re black and cracked — swap them out. Prevention is cheaper than diagnosis every single time.
The structured approach — feet first, crossbars second, accessories third — takes about an hour and solves the problem nine times out of ten. Test methodically. Tighten deliberately. Your ears will thank you somewhere around mile 40 of your next highway stretch.

Stay in the loop
Get the latest trail owl updates delivered to your inbox.