Why Tire Pressure Changes Everything Off-Road
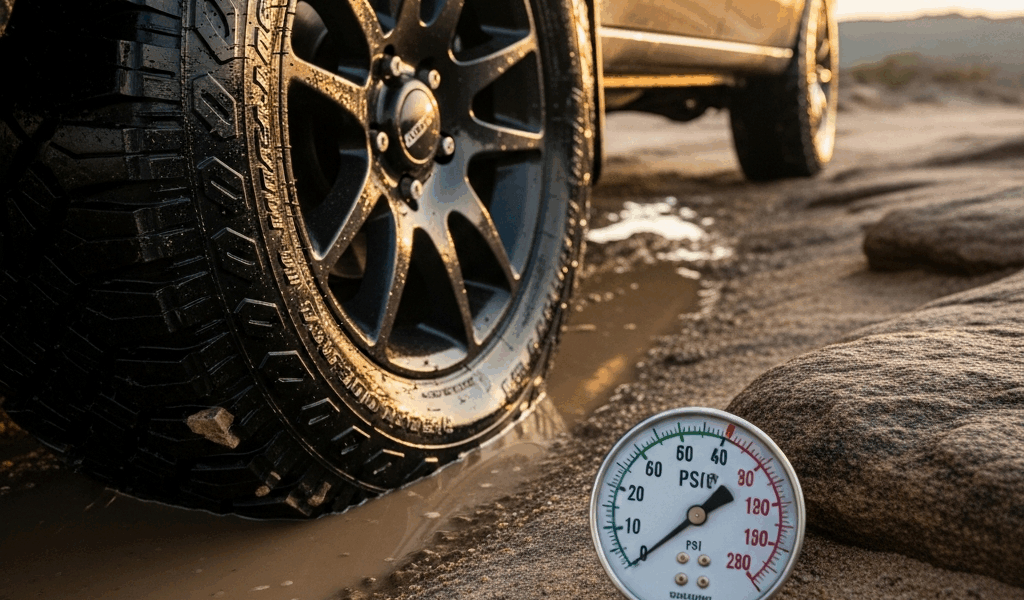
Overlanding tire pressure has gotten complicated with all the conflicting advice flying around. And honestly, most of it misses the core issue — what actually happens to your contact patch when you drop from highway PSI to trail PSI. That single change determines whether you’re moving forward or digging an expensive hole.
Here’s the part that clicks once you see it in person. Your tire is essentially an air-filled balloon pressing down on whatever’s beneath it. At 35 PSI on pavement, that pressure concentrates into a small, firm footprint. Drop to 15 PSI in deep sand, and that same tire spreads out like it’s melting into the ground — more rubber touching surface, better grip on loose material, less sinking.
But what is the right PSI? In essence, it’s whatever matches the terrain beneath you. But it’s much more than that. Aired down too much on rocks and you risk pinching the sidewall. Too much air in sand and you’ll spin on the surface like you’re on polished concrete. The mistake most overlanders make on their first trip is treating “air down” as one universal instruction.
It isn’t. The physics changes completely depending on what’s underneath you.
PSI Ranges for Sand, Mud, Rock, and Trail
Deep Sand — 10 to 15 PSI
Sand doesn’t support weight. It shifts. Your goal is maximum footprint with zero aggression, because any sharp edge or hard sidewall punches through and buries the tire.
I learned this the hard way out in the Mojave — aired down to 20 PSI, figured I was being cautious. Bogged down anyway. The tire was still too stiff to float across the surface. Next dune I dropped to 12 PSI and the difference was immediate. The sidewall flexed into the sand, spread the load, and the rig rolled through like the ground was actually cooperating for once.
Start at 12-15 PSI depending on your vehicle weight. Lighter rigs can run 15 PSI. Heavier builds — full expedition setups with water, tools, and a rooftop tent — might need 10-12 PSI to avoid sinking. The risk of going lower is sidewall damage and bead separation, which is where the tire unseats from the rim entirely. Most stock wheels aren’t beadlock-equipped, so 10 PSI is basically the floor for safety without specialty hardware.
Mud — 18 to 22 PSI
Mud is the inverse of sand. It grips aggressively — sometimes too aggressively. Your tire can sink into it fast, but the real enemy is suction. You want a contact patch large enough to distribute weight without the tire locking into the mud like a plunger.
18-22 PSI gives you that window. The tire flexes enough to maintain traction on the sides while keeping the sidewall rigid enough to avoid bottoming out on the bead. On wet clay or thick gumbo, stay closer to 18 PSI. On mixed mud with gravel, 20-22 PSI is safer — the harder subsurface can support more pressure without punishing you for it.
The common error is airing all the way down to sand PSI in mud. The sidewall works overtime, overheating follows, and eventually something gives. Don’t make my mistake.
Rocky Trails — 20 to 25 PSI
Rocks want pressure. Not highway pressure — that’ll shred an over-inflated sidewall on a sharp ledge — but enough to keep the bead seated and the carcass protected from pinching between the rim and a boulder.
20-25 PSI lets the tread flex into rocky surfaces for grip without sacrificing sidewall protection. The stiffer profile rolls over sharp edges instead of conforming around them and getting cut. On technical terrain with exposed bedrock, lean toward 23-25 PSI. On rounder boulder fields, 20-22 PSI works fine.
Going below 20 PSI on rocks is the fastest route to a sidewall puncture or a separated bead. I’ve watched both happen. The second one strands you mid-trail with a wheel that won’t seal and zero good options for getting out.
Mixed Gravel Trail — 25 to 30 PSI
Gravel roads that aren’t extreme terrain benefit from higher pressure. The substrate is stable enough that maximum footprint isn’t necessary — and the sharp edges of gravel fragments will cut into a soft sidewall given enough miles.
25-30 PSI keeps the tire compliant for comfort without creating sidewall vulnerability. Maintained roads with some washboard and ruts but no real rocks? Stay at 26-28 PSI. You’ll preserve fuel economy and tire life, and you won’t notice any meaningful grip difference.
The Load Factor
All these ranges assume normal trail loading. A stock overlander with gear fits here. A fully loaded expedition rig — water jerry cans, Hi-Lift jack, two spare tires, full Pelican case setup — needs 2-3 PSI higher across the board. More weight requires more air support to avoid bottoming the sidewall. A lightly loaded ATV can drop another 2 PSI lower. Know your actual weight. Don’t guess at it.
How to Air Down Correctly Without Wrecking Your Bead
The process matters as much as the target PSI. So, without further ado, let’s dive in.
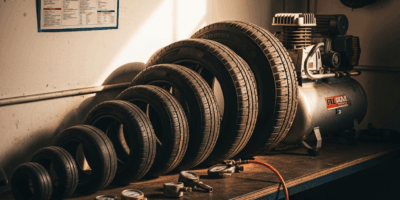
Use an automatic deflator — not a stick. A stick deflator is just a needle valve you press onto the stem. It bleeds air fast and unpredictably, and you’ll overshoot your target before you realize it. A quality deflator like the Staun or the ARB unit clips on and stops automatically at your preset PSI. They run $20-40. Worth every dollar, because one ruined bead costs $150-plus in tow fees and a wasted afternoon.
Bleed in 5 PSI drops. Clip the deflator, wait about 10 seconds, check with a gauge. The tire needs a moment to equalize internally. Rushing causes overshooting. I’m apparently very impatient about this, and the ARB deflator works for me in a way that the cheap stick version never did — it physically stops me from going too fast.
Watch the sidewall as pressure drops. On aggressive drops from 35 PSI down to 15 PSI, the tire bulges visibly at the contact patch. If the bead starts to crease or wrinkle at the rim edge, you’ve gone too far. Most stock wheels hold the bead fine down to 10 PSI, but beadlock-free wheels on 33-inch or larger tires get sketchy below 12 PSI, especially under load.
Check all four tires with an actual gauge. Not eyeballing. Two tires at 18 PSI and two at 22 PSI will give you a handling mess and uneven grip — and you’ll spend 20 minutes blaming the terrain before you figure out what happened.
When You Need to Air Back Up Mid-Trail
Probably should have opened with this section, honestly. Most articles stop after explaining how to air down. They skip the part where you might need to switch terrains mid-trip or pull yourself out of trouble.
Scenario one: you air down to 12 PSI for deep sand, the sand ends, and now you’re transitioning to rocky terrain. You need to air up to 22 PSI before the rocks shred your sidewalls. Most overlanders carry an onboard compressor — Viair 450C, ARB CKMTA12, or similar in the $200-400 range — for exactly this. Without one, you’re essentially committed to one terrain type per outing or you walk home.
Scenario two: you get stuck in mud at 14 PSI and need to use a high-lift jack or run a winch recovery. Aired-down tires can’t handle concentrated side load. You must air up to at least 20 PSI before lifting, or the tire deforms under the jack and potentially unseats the bead entirely. This is non-negotiable and genuinely easy to forget when you’re panicking about being buried to the axles.
Scenario three: you finish the trail and have 40 miles of paved highway home. That’s what makes this scenario catch people — the trail is done, the hard part feels over. Aired-down tires on pavement overheat within 10-15 minutes at highway speeds. The sidewalls flex constantly at speeds they’re not designed for. That flexing generates heat. Heat destroys the rubber bond layer. You risk delamination or full blowout. Air up to at least 28 PSI before pavement — not full highway PSI, but enough to keep the sidewall from working itself apart.
Common Tire Pressure Mistakes and How to Fix Them
Uneven Pressure Between Axles
You air down the fronts to 18 PSI and forget the rears are still sitting at 22 PSI. The front grips differently. The rig handles weirdly. You blame the terrain for 20 minutes before checking your pressures.
Fix: write your target PSI on your hand before you start. Check all four tires with a gauge every single time. Takes two minutes. Saves a lot of confusion.
Ignoring the Spare
You aired down your four trail tires. The spare mounted on the rear carrier is still at 35 PSI. If you puncture a main tire mid-trail and swap in the spare, the handling difference will be immediate — and completely confusing in the moment.
Fix: air down your spare to match the terrain you’re running, or carry a compact pump and accept you’ll need to adjust it if you actually use it.
Using Hot Tire Pressure as Baseline
You drive 20 minutes on pavement to the trailhead. Tires heat up to 38 PSI instead of your cold baseline of 35 PSI. You air down based on 38 PSI and end up 3 PSI lower than you intended on every tire. That was a real problem on a rocky trail I ran in Utah a few summers back — took me an embarrassingly long time to figure out why everything felt wrong.
Fix: measure cold pressure in the morning before driving anywhere, or wait 30 minutes after arrival for tires to cool back down before you start deflating.
Not Re-Inflating Before Highway Driving
Trail’s done, you’re excited to get home, you merge onto the interstate at 16 PSI. Within 20 minutes the sidewalls are flexing visibly. Within 40 minutes you’re gambling with a blowout at highway speed.
Fix: air up before any paved driving — even slow paved sections within the trail system. Set a phone alarm labeled “AIR UP” if needed. That’s not embarrassing. Changing a blown tire on the interstate shoulder is embarrassing. And expensive.

Stay in the loop
Get the latest trail owl updates delivered to your inbox.